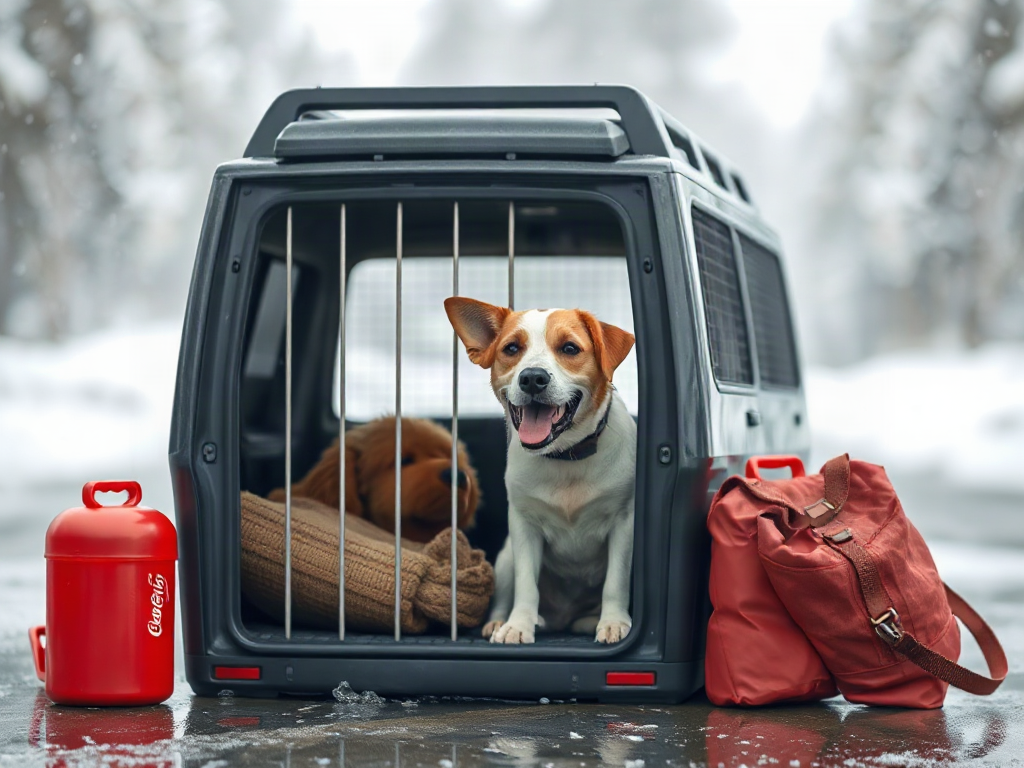
Dog crates for wet weather travel should combine a nonabsorbent shell or coated fabric, protected ventilation, a leak-resistant floor, and removable bedding that can be dried promptly. The crate must remain ventilated even when rain covers are used, because sealing openings can trap heat and moisture around the dog. After each wet trip, remove the liner, wipe the floor and joints, inspect metal hardware for corrosion, and leave every surface open until fully dry. Avoid placing a soaked dog on thick absorbent bedding for hours; carry towels and a spare dry liner so the crate remains stable, sanitary, and comfortable during the return journey.
Which Crate Material Handles Rain Best?
Crate construction determines where water collects, how quickly the enclosure dries, and whether repeated exposure damages its hardware. Molded plastic crates resist wind-driven rain on their solid sides and usually have fewer absorbent components. Their recessed floors can contain a modest amount of water from wet paws, but seams, door thresholds, and ventilation holes still need attention. A solid shell is not waterproof, and water entering through an open door can remain beneath the liner.
Wire crates provide strong cross-ventilation and let owners see damp bedding quickly. Their weakness is exposure: rain can enter from every side, and an improvised cover can defeat the ventilation advantage. Metal joints, welds, latches, and removable pans should be checked for chipped coatings or developing corrosion. A wire model can work inside a dry vehicle or under a rigid shelter, but it is a poor choice for an uncovered loading area in persistent rain.
Soft-sided crates are lighter and easier to carry between a vehicle and lodging, yet their performance varies with fabric, seams, mesh placement, and internal reinforcement. Water-resistant fabric may shed brief rainfall without being waterproof. Stitching, zipper tape, mesh panels, and fabric-covered support rods can retain moisture long after the exterior feels dry. A collapsible crate stored while damp may develop odors or material damage in folds that receive little airflow.
Match the construction to the actual route rather than choosing by material alone. A plastic crate may suit repeated transfers across an exposed parking lot, while a soft crate may be reasonable when it stays inside the vehicle and only encounters wet paws. For a large dog riding in a secured cargo area, a coated metal crate with a removable floor may offer durability if the vehicle keeps direct rain out.
Fit and structural condition remain more important than a weather label. The dog should be able to stand, turn, and lie naturally, and the door must latch reliably after the crate is loaded. Before departure, run a dry cloth along the floor edge, corners, fasteners, and underside. Rough edges, cracked plastic, swollen panels, peeling coatings, or a warped pan are signs that weather exposure is already affecting the crate. Do not assume a rain cover will compensate for a damaged enclosure.
How Do You Protect Airflow Without Letting Rain In?
Rain protection should redirect water without enclosing the crate in a humid pocket. Dogs release heat and moisture into a confined space, while a wet coat and damp liner add more humidity. Covering every opening may stop visible rain but can reduce air exchange and obscure signs that the dog is becoming uncomfortable. Plastic sheeting wrapped tightly around a crate is especially risky because it can shift over vents and collect condensation.
Use the vehicle or a fixed overhead shelter as the primary barrier whenever possible. Position the crate away from an open tailgate, leaking door seal, or roof runoff. If a cover is needed during a short transfer or sheltered stop, protect the top and rain-facing side while leaving openings on at least two other sides unobstructed. Secure the material outside the crate so the dog cannot pull it through mesh or chew loose straps.
Air movement and rain direction can change during a journey. A covered crate that works while parked may receive spray when a door opens, and a cover can shift when luggage is moved. Check the dog and crate at every practical stop. Look for water tracking down an interior wall, condensation on the shell, saturated fabric, persistent shivering, heavy panting, agitation, or unusual quietness. Those signs call for a change in shelter, bedding, temperature, or travel plan rather than another layer over the crate.
A common mistake is placing the crate directly beside a vehicle heater to dry the dog. Concentrated hot air can create an uncomfortable temperature gradient and may dry the upper coat while the underside and bedding remain wet. Towel the dog before loading, use moderate cabin temperature, and maintain normal ventilation instead. Dogs with very short coats, puppies, older dogs, and dogs with health limitations may tolerate cold and damp conditions differently; ask a veterinarian for trip-specific guidance when temperature regulation is a concern.
Protection should also preserve visibility and access. The door and latch need to remain reachable in case the dog must be removed promptly. Do not let tarps, luggage, towels, or rain gear block the door or cover all sightlines. A stable exterior shield with open ventilation is preferable to a loose blanket draped over the entire enclosure. If heavy rain cannot be kept away without sealing the crate, move the crate to a protected location rather than trying to make an unsuitable spot weatherproof.
Wet-Trip Crate Setup Checklist
A wet-weather setup should separate water management from restraint. Towels, liners, and floor protection deal with moisture; they do not secure the crate or the dog. Use the crate’s intended vehicle attachment points or a vehicle-compatible restraint method, following the instructions supplied by the crate and vehicle manufacturers. Do not route straps across a door, through a weak ventilation opening, or around a collapsible frame in a way that can deform it.
Start with a clean, dry floor and a thin liner that lies flat. A nonslip underside helps prevent bunching when the dog turns, while a removable top layer makes a roadside change manageable. Deep beds can feel comfortable when dry but may absorb substantial water, hide a wet lower surface, and shift the dog’s footing. Waterproof pads can protect the base, but an exposed slick pad is not a comfortable substitute for stable bedding.
Predeparture Priority Check
- Inspect the shell and door: confirm that panels, hinges, latches, and attachment points are sound.
- Test the liner: make sure it stays flat and does not obstruct the door or ventilation openings.
- Pack a dry change: carry at least one replacement liner, absorbent towels, and a bag for wet items.
- Choose the loading route: park under cover when available and keep the crate door closed until the dog is ready to enter.
- Secure the load: prevent the crate and nearby wet gear from sliding during braking or turns.
Consider a typical trailhead departure in steady rain. The dog returns muddy, the rear hatch is open, and the owner places a towel over the existing bed. The visible surface may look acceptable, but water can soak through to the original liner and pool at the back of the pan. A better sequence is to towel the dog’s legs, belly, and coat outside the crate, remove any damp liner, wipe the base, and install the dry replacement before loading.
Keep wet boots, umbrellas, and used towels outside the dog’s enclosure. Loose equipment can block vents, press against soft panels, or become a chewing hazard. Store wet supplies in a separate waterproof container, but do not seal damp crate bedding for longer than necessary. Unpack it promptly at the destination so it can be washed and dried.
The setup is working when the liner remains flat, the dog’s coat becomes drier rather than wetter, vents stay clear, and the crate does not move with normal vehicle motion. Failure signs include puddling beneath the bedding, a shifting floor pan, straps loosening on wet surfaces, condensation increasing, or the dog avoiding a saturated section. Stop in a safe place and correct the cause; adding more towels over trapped water only hides the problem.
How Should You Clean, Dry, and Inspect the Crate?
Drying begins by taking the crate apart only as far as its manufacturer permits. Remove the liner, floor pan, cover, and washable accessories, then clear mud and standing water before applying any cleaner. Dirt lodged in a latch or track can interfere with closure, while grit left beneath a removable pan can abrade protective finishes. Consult the product instructions before using disinfectants or placing fabric components in a washing machine.
Clean hard surfaces with a product appropriate for the crate material, rinse or wipe away residue as directed, and dry with the door open. Pay attention to overlapping plastic, bolt heads, hollow frame ends, zipper folds, hook-and-loop strips, and the underside of the floor. These areas dry more slowly than broad panels. A fan and good room ventilation can speed evaporation, but direct high heat may distort plastic, weaken adhesives, or damage coated fabric.
Soft crates require a more deliberate inspection. Extend all folded panels, open zippers, and expose fabric wrapped around frame members. Press a dry towel against seams to check for hidden moisture. If a section still feels cool or transfers dampness, it is not ready for storage. Folding a slightly wet crate concentrates moisture between layers, which encourages persistent odor and makes the next trip begin with compromised bedding and fabric.
For metal crates, inspect the lower bars and welds where wet paws and floor splash are most likely to reach. Surface discoloration, flaking coating, stiff hinges, or a latch that no longer moves cleanly deserves attention under the manufacturer’s maintenance guidance. Do not conceal a weakened joint with a cover or tape. Plastic crates should be checked for cracks around fasteners, door mounts, handles, and corners, especially after a loaded crate has been carried over slippery ground.
A practical routine separates immediate care from storage care. At arrival, remove wet textiles and wipe the enclosure so the dog is not left on a damp surface. After unloading, perform the deeper cleaning and inspection under good light. Reassemble only when every component is dry, then test the latch and verify that the floor sits correctly. A persistent musty smell, recurring dampness inside a seam, swelling, corrosion, or a door that binds indicates that cleaning alone may not be enough; repair or replacement may be the safer decision.
Frequently Asked Questions
Are plastic or metal dog crates better in wet weather?
Plastic shells usually block wind-driven rain and wipe clean more easily, while wire crates provide more airflow but need carefully positioned exterior shelter. The better choice depends on exposure, vehicle space, the dog's temperature needs, and whether the crate can be dried promptly.
Should I cover a dog crate when it is raining?
Cover only the rain-facing portion and keep multiple ventilation openings unobstructed. A cover should not wrap the crate tightly or trap warm, humid air, and it must be secured so it cannot flap against the crate.
What bedding works best in a wet travel crate?
Use a thin, washable, quick-drying liner with a nonslip underside, plus a dry replacement. Thick foam and deep fabric beds are harder to dry and may retain water in seams after a muddy trip.
How do I dry a dog crate after wet travel?
Remove bedding and loose parts, wipe away standing water and dirt, clean according to the manufacturer's instructions, and leave doors and vents open in a ventilated area. Do not store or fold the crate until seams, joints, and the underside are dry.
Can a wet dog remain in a travel crate?
Dry the dog's coat as much as practical before crating and replace saturated bedding promptly. Continued shivering, heavy panting, unusual lethargy, or distress warrants stopping the trip and seeking appropriate veterinary guidance.
Conclusion
A dependable rainy-day crate setup is built around controlled exposure, open ventilation, stable footing, and materials that can be inspected and dried. Choose construction that suits where the crate will actually be used: a solid shell for exposed transfers, a ventilated wire crate for protected interiors, or a soft crate only when its fabric and seams can be dried fully. Before leaving, test the latch and restraints, fit a flat removable liner, and pack towels plus a dry replacement.
During the trip, check for water beneath the bedding rather than judging only the visible surface. Redirect rain without wrapping the enclosure, and respond to condensation, temperature discomfort, shifting gear, or saturated fabric promptly. At the destination, remove wet textiles, clean joints and floor edges, and keep the crate open until hidden areas are dry. Replace damaged components instead of asking a cover or extra bedding to compensate for structural wear.