Instant Answer: Using a travel carrier for a pet ensures their safety and comfort during transportation, reducing stress and anxiety. It provides a secure space that prevents injuries and escapes, especially in busy or unfamiliar environments. Additionally, a proper carrier helps comply with airline and transportation regulations, making travel smoother. Overall, it promotes a safer, more comfortable journey for pets and peace of mind for owners.
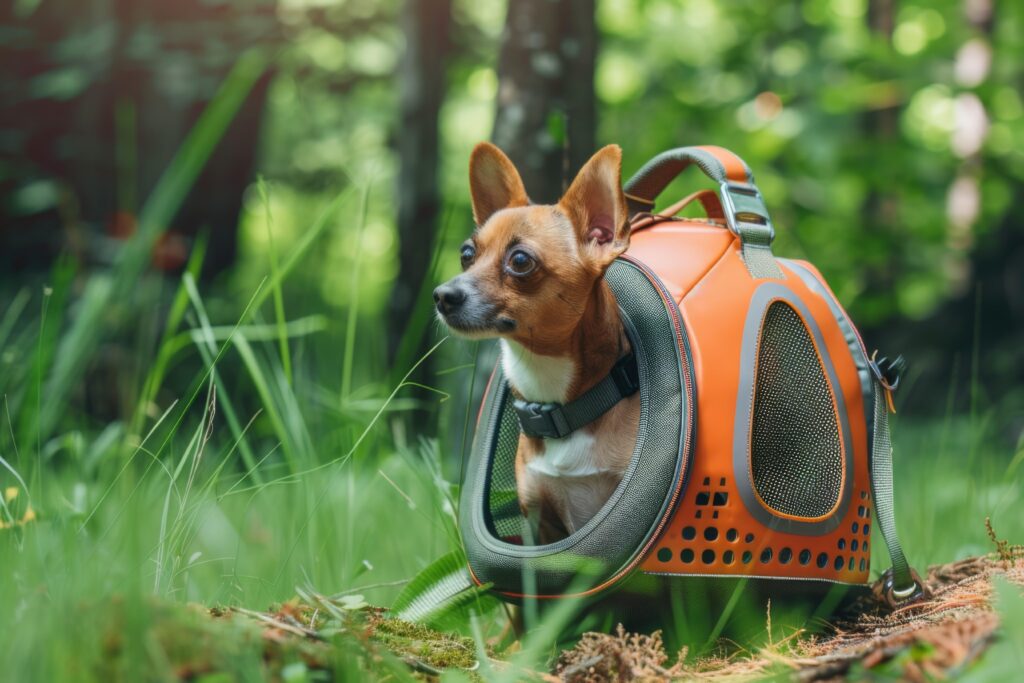
Table of Contents
- Build a Travel Carrier For Pet Plan You’ll Actually Keep
- Understanding the Importance of a Good Pet Travel Carrier
- Planning Your DIY Pet Travel Carrier
- Gathering Materials and Tools
- Step-by-Step Construction Process
- Tips for Making Your Pet Carrier Keep-Worthy
- Additional Features to Consider
- Legal and Safety Considerations
- Conclusion: Creating a Travel Carrier Your Pet Will Love
- Other Questions People Ask
- What should I look for in a travel carrier for my pet?
- Are airline-approved pet carriers different from regular travel carriers?
- How can I make my pet more comfortable in a travel carrier?
Build a Travel Carrier For Pet Plan You’ll Actually Keep
Personal Anecdote: When I first started travel carrier for pet, I remember struggling with the basics. It took patience and a few mistakes to understand how to get it right.
Traveling with a pet can be a stressful experience for both owner and animal, but choosing the right travel carrier can make all the difference. A well-designed carrier offers a cozy, secure space that keeps your pet calm and safe amidst the chaos of airports, car rides, or unfamiliar surroundings. It’s more than just a container; it’s a trusted refuge that prevents escapes and injuries while helping you stay compliant with airline and transportation rules. When your pet feels protected and comfortable, the entire journey becomes smoother, allowing you to focus on the adventure ahead rather than worry about what might go wrong.
Understanding the Importance of a Good Pet Travel Carrier
A high-quality travel carrier is more than just a container; it’s a safe haven for your pet during transit. Pets often experience stress and anxiety when traveling, especially if they are not accustomed to being in a confined space. A well-constructed carrier can help reduce this stress by providing a familiar, cozy environment. Additionally, a sturdy carrier ensures your pet’s safety by preventing accidental escapes or injuries during movement.
For example, small dogs like French Bulldogs or Chihuahuas benefit from carriers that are lightweight yet sturdy, with ample ventilation. Cats, on the other hand, often prefer carriers with secure doors and soft interiors that mimic their natural hiding spots. Understanding your pet’s behavior and preferences is key to designing a carrier that they will actually keep and use willingly.
Planning Your DIY Pet Travel Carrier
Before you start building, it’s crucial to plan out the design and materials based on your pet’s size, breed, and travel habits. Consider the following factors:
- Size: The carrier should be large enough for your pet to stand, turn around, and lie down comfortably. For example, a medium-sized Labrador Retriever needs a significantly larger carrier than a small hamster or guinea pig.
- Material: Choose durable, lightweight materials such as plastic, aluminum, or reinforced fabric. For instance, hard plastic carriers are ideal for air travel, while soft-sided carriers are better for car trips or short outings.
- Ventilation: Adequate airflow is essential. Incorporate multiple ventilation holes or mesh panels to keep your pet cool and comfortable.
- Security: Ensure the carrier has secure latches or zippers that cannot be easily opened by your pet or during transit.
- Comfort: Add soft bedding, familiar toys, or an item with your scent to help reduce anxiety.
Gathering Materials and Tools
Once you’ve planned your design, gather the necessary materials. Here’s an example list for a DIY hard-sided carrier:
- Plastic or lightweight plywood panels: For the walls, floor, and roof.
- Heavy-duty hinges and latches: To secure the door and panels.
- Screws and bolts: For assembly.
- Ventilation mesh or perforated panels: To ensure airflow.
- Soft bedding or foam padding: For interior comfort.
- Tools: Drill, screwdriver, measuring tape, saw (if cutting panels yourself).
Step-by-Step Construction Process
Follow these detailed steps to build a sturdy and comfortable travel carrier:
1. Measure Your Pet
Accurately measure your pet’s height, length, and width. Add at least 2-3 inches to each dimension to ensure ample space. For example, if your small dog measures 16 inches in length and 12 inches in height, plan for a carrier approximately 20 inches long and 15 inches high.
2. Cut the Panels
If you’re using plywood or plastic sheets, cut them according to your measurements. Use a saw suitable for the material—jigsaw for plastic or plywood. Remember to include extra panels for ventilation areas.
3. Assemble the Frame
Begin by attaching the side panels to the base using screws and hinges where necessary. Ensure all edges are smooth to prevent injury. Attach the top panel last, securing it firmly with hinges if you want it to open for easy access.
4. Install Ventilation
Cut out holes or attach mesh panels on opposite sides of the carrier for airflow. Reinforce edges with additional framing or trim to prevent tearing or damage.
5. Secure Doors and Latches
Create an opening on one side for the door. Attach a latch or lockable clasp that is easy for you to operate but secure enough to prevent accidental opening during transit.
6. Add Interior Comforts
Line the interior with soft bedding or foam padding. Place familiar toys or an item with your scent inside to help soothe your pet during travel.
Tips for Making Your Pet Carrier Keep-Worthy
- Personalize It: Decorate the exterior with your pet’s name or favorite colors using non-toxic paint or stickers.
- Test It First: Before traveling, let your pet explore the new carrier at home. Place treats inside and encourage them to go in voluntarily.
- Practice Short Trips: Gradually increase travel duration to help your pet get accustomed to the carrier.
- Ensure Easy Cleaning: Design the carrier so that it can be easily cleaned with removable bedding and accessible panels.
Additional Features to Consider
If you want to upgrade your DIY carrier further, consider adding features such as:
- Built-in water bottle holder: To keep your pet hydrated during long trips.
- Adjustable ventilation windows: To control airflow based on weather conditions.
- Padded handles or shoulder straps: For easier carrying.
- Transparent windows or viewing ports: So your pet can see outside and reduce anxiety.
Legal and Safety Considerations
Always check airline regulations if flying with your pet. Many airlines require carriers to meet specific size and construction standards. For ground transportation, ensure the carrier is stable and secure in your vehicle. Never leave your pet unattended in a carrier outside of supervised environments to prevent accidents or injuries.
Conclusion: Creating a Travel Carrier Your Pet Will Love
Building your own pet travel carrier is a rewarding project that combines practicality with personalization. By carefully planning, selecting appropriate materials, and following detailed construction steps, you can create a safe haven that your pet will actually keep and use happily. Remember that patience and attention to detail are key—your effort will pay off when you see your pet comfortably traveling in their new custom-made carrier. With a little creativity and some basic tools, you can ensure every trip is safer and more enjoyable for both you and your furry friend.
If you’re unsure about specific safety standards or need additional inspiration, consult resources from reputable organizations such as the American Veterinary Medical Association (AVMA) or visit government websites like FDA.gov.
Other Questions People Ask
How do I choose the right materials for building a travel carrier for my pet?
Select durable, lightweight materials such as plastic, reinforced fabric, or aluminum to ensure safety and ease of transport. Consider your pet’s size and travel environment when choosing between hard-sided or soft-sided carriers. Incorporate ventilation panels or mesh for airflow, and ensure all materials are non-toxic and secure to prevent escapes or injuries.
What features should I include in my DIY travel carrier to make it pet-friendly and secure?
Add secure latches or zippers that your pet cannot open and reinforce edges to prevent tearing. Include soft bedding or familiar items inside to reduce anxiety, and ensure the carrier has ample ventilation. Personalize the carrier with your pet’s name or favorite colors, and test it at home with short trips before actual travel.
How can I ensure my pet stays comfortable and calm in a travel carrier I built myself?
Line the interior with soft padding or foam and place familiar toys or a scent item inside to soothe your pet. Gradually introduce the carrier through short, positive experiences at home, encouraging your pet to explore it voluntarily. Practice short trips to help your pet associate the carrier with safe, comfortable travel experiences.